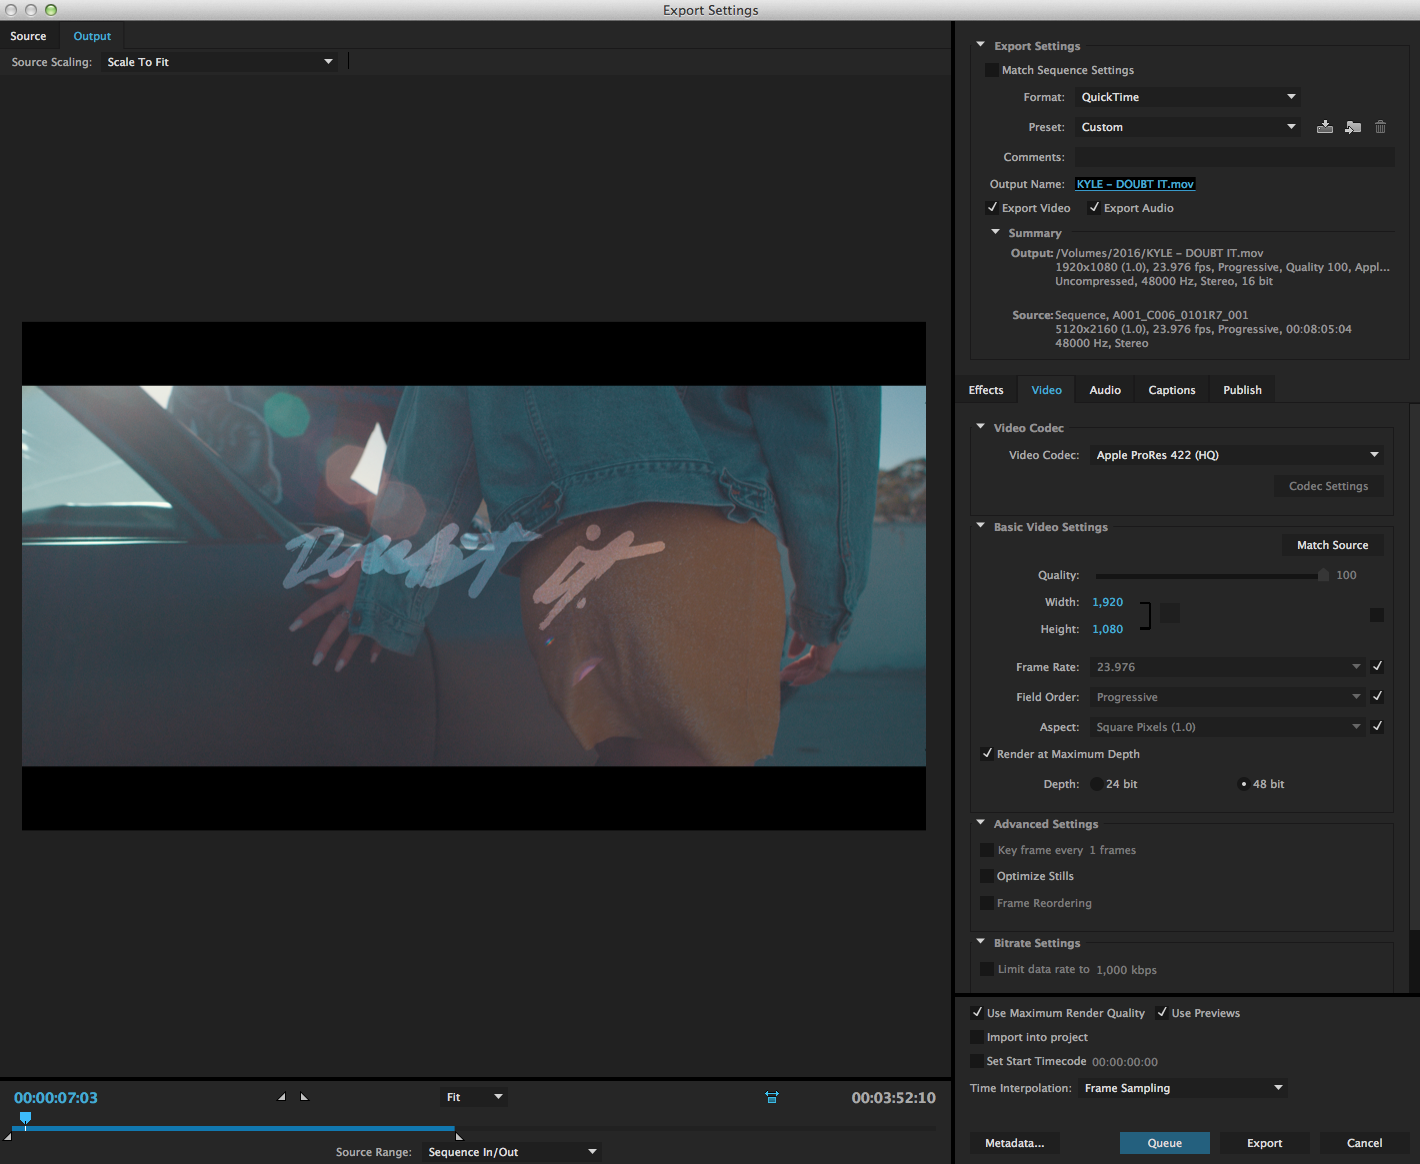
A proper export is essential to making sure all the handwork you put into directing, lighting, shooting, editing, coloring, your video all come together to look as beautiful as possible! I get a lot of questions about “What are my export settings/process?” especially when it comes to uploading a video for YouTube. Below I’ll show you the exact settings in which I export a video out of Adobe premiere for a YouTube video upload!
In the screenshot above you can see the exact settings that I’ve selected and use for my video export. I pretty much ALWAYS export a video using the video codec “Apple ProRes 422 (HQ), I do this for a couple reasons. The first of which is that this particular codec is the least compressed out of all the codecs. One of the more popular codecs people export in, is the h.264 codec, but I don’t typically export in this codec for the fact that it is a more compressed file and takes a heck of alot more time to export. Secondly, Vevo requires 1080p Proress 422HQ file. A lot of the video files I end up exporting will live on Vevo, and not only that, but if they require a Proress 422HQ file than I’m more than likely going to stick with that for my own personal YouTube uploads as well.
If any of this is still confusing to you, or you’re still unsure about each step to take, then check out the link below. This video is a step by step tutorial on my export process.
Export Tutorial: https://www.youtube.com/watch?v=b8Mn-GxKi9M
Make sure to check out more of our different products such as LUT bundles, tutorials, treatments and more on my big cartel site: http://jakobowensproductions.bigcartel.com

